Introduction
This easy DIY epoxy coaster project provides simple instructions for creating functional works of art so pretty you won’t want to cover them with drinks. Personalize each coaster with embedded objects or colorful designs that’ll create a custom look for your bar top, coffee table, or bar cart.
Our TotalBoat Epoxy Coasters Kit includes TotalBoat High Performance Epoxy Resin and Hardener, epoxy-safe pigments, reusable coaster molds (square and hexagon shapes, approximately 4-1/2″ x 4-1/2″), mixing tools, heat gun, and easy-to-follow instructions. The finished coasters have a raised lip to provide added protection. Make some for yourself or for your friends, because coasters are a great gift everyone will love!
IMPORTANT: The timing and accuracy of each step are critical to getting great results, as is knowing how to blend the different pigments to create the beautiful designs you have in mind. Please read all instructions carefully before you begin. Have fun!
Tools
-
-
Lay out your molds and materials so everything you need is close at hand before you start pouring epoxy.
-
Be sure to protect your work surface with plastic sheeting, and level the surface so your coasters will be flat.
-
-
-
HOW MUCH MIXED EPOXY DO I NEED? Here are estimates for the volume of mixed epoxy you’ll need to fill the coaster molds included in the kit:
-
1 Square Mold - Part A (Resin): 2.7 oz. (80ml) Part B (Hardener): 1.3 oz. (40ml) Total Mixed Epoxy Volume: 4 oz. (120ml)
-
1 Hexagon Mold - Part A (Resin): 2 oz. (60ml) Part B (Hardener): 1 oz. (30ml) Total Mixed Epoxy Volume: 3 oz. (90ml)
-
1 Square Mold & 1 Hexagon Mold -Part A (Resin): 4.6 oz. (136ml) Part B (Hardener): 2.3 oz. (68ml) Total Mixed Epoxy Volume: 7 oz. (207ml)
-
2 Square Molds & 2 Hexagon Molds - Part A (Resin): 10 oz. (296ml) Part B (Hardener): 5 oz. (148ml) Total Mixed Epoxy: 15 oz. (444ml)
-
-
-
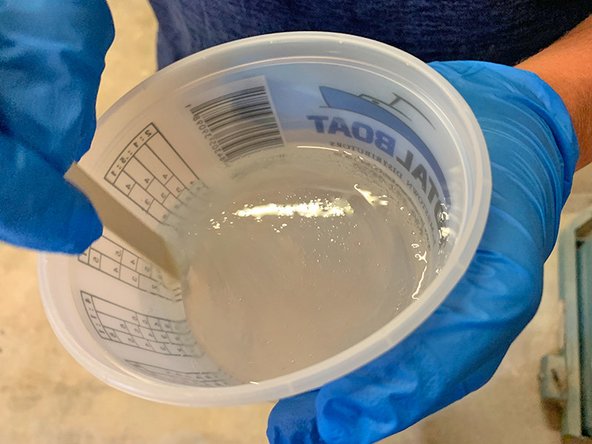
Use the pump method or pour method to measure a small batch of TotalBoat High Performance Epoxy by volume (2 parts resin to 1 part hardener) or by weight (100 parts resin to 45 parts hardener). Be sure to use a clean, dry plastic mixing cup.
-
Make sure you use the exact ratio of resin to hardener, or your coasters won’t cure properly.
-
Pump Method: The pumps are calibrated to dispense the exact ratio of 2 parts resin to 1 part hardener, by volume. Install the epoxy resin & hardener pumps into the resin & hardener bottles, as directed. Prime the pumps until they dispense a steady stream. Add 1 full pump of resin to 1 full pump of hardener until the desired volume is reached.
-
Measure by Volume: If not using the pumps, pour 2 parts resin to 1 part hardener.
-
Measure by Weight: Measure 100 parts resin to 45 parts hardener. (1) Select grams on your scale. (2) Place your mixing cup on the scale and zero out the weight. (3) Add the desired amount of resin (Part A) to the cup. (4) Determine the amount of High Performance Hardener (Part B) by multiplying the gram weight of the resin x .45.
-
-
-
Use a clean tongue depressor and stir slowly to prevent air bubbles.
-
Mixing Tip: To ensure that both components are mixed thoroughly, use the 2-cup mixing method: Stir slowly for about 2-3 minutes, scraping the sides and bottom of the cup to mix both components thoroughly. Next, pour the mixture into a clean mixing cup and stir again for 2-3 minutes. Mixed epoxy should be clear, not cloudy.
-
Optional: At this point, after mixing thoroughly, you can add pigments, if desired. Mica powder pigments are easier to add before you pour the mixed epoxy into the molds. Note that a little pigment goes a long way!
-
-
-
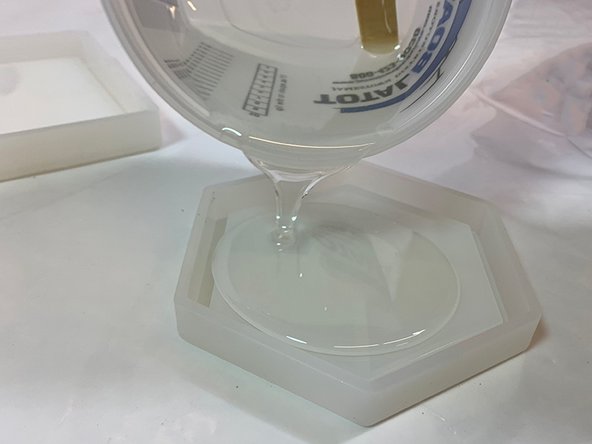
Pour mixed epoxy slowly into the mold to avoid splashing and prevent excess air bubbles.
-
Optional: At this point, you can embed small objects, if desired. Coat the objects in mixed epoxy before embedding in the coaster mold, as shown in the second image. This action prevents excess air bubbles from forming.
-
IMPORTANT NOTE: As you create your epoxy coasters, remember that the top of the coaster is the bottom of the mold. This means you’ll need to add features upside down (because the top is at the bottom) to ensure your design is right-side-up when you demold your coaster!
-
-
-
Mica Powder Pigments: Add intense color and sparkle to your coasters with mica pigments (see first image). Divide clear mixed epoxy into smaller cups and add a little powder pigment at a time until the desired color is achieved. The recommended pigment load is 1g of pigment per 1-5 oz. of epoxy (25-50g of pigment per gallon).
-
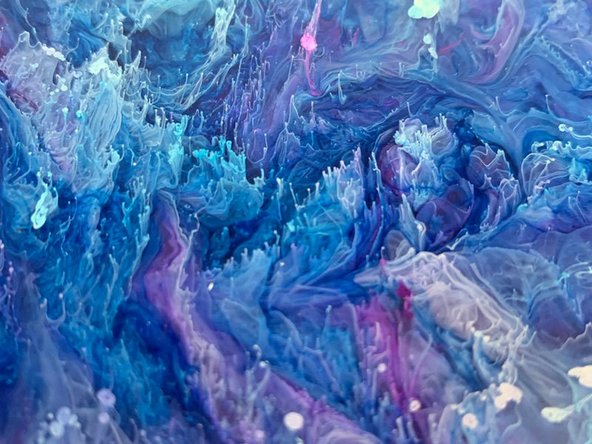
Alcohol Ink Pigments: Alcohol inks give you either a droplet effect or a translucent colored look.
-
For a droplet effect, first, drop the colors you want into the epoxy in the mold. Then add white ink drops on top (white is heavier and sinks the colors). See second image.
-
For a translucent effect, add drop by drop until the desired color is achieved. Tip: Put rubbing alcohol in a spray bottle and spritz on top of your finished coaster for a speckled effect. See third image.
-
-
-
To bring small air bubbles to the surface and remove them, wave the heat gun back and forth quickly across the surface of the epoxy for a few seconds.
-
Stay about 4 inches above the surface and keep the heat gun moving so you don’t scorch the surface.
-
-
-
Let your coasters cure in their molds for 24 hours.
-
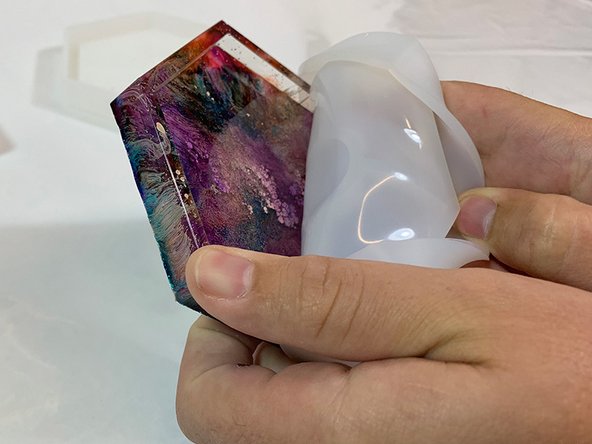
Once the epoxy has cured completely, remove each coaster by flexing its mold and peeling the mold away from the coaster. Sand any rough or sharp edges with 220-grit sandpaper, if needed.
-
-
-
What is epoxy sensitization? Ever hear of someone getting a skin rash after using epoxy? A rash is one form of sensitization — it's the process where your body gets more and more sensitive to epoxy products. Rashes are a common sign, but eyes, nose, throat, & lungs can also be affected. Everyone reacts differently, so proper PPE is critical.
-
Before you start creating your epoxy coasters, we recommend the following:
-
Take a look at the SDS (safety data sheets) for each product, paying special attention to the safety information in Section 8: Exposure Controls/Personal Protection.
-
Gather the proper PPE (personal protective equipment) recommended by the manufacturers, such as suitable gloves, and proper protection for eyes, skin, lungs, and clothing.
-
Make sure your work area is well ventilated.
-