Introduction
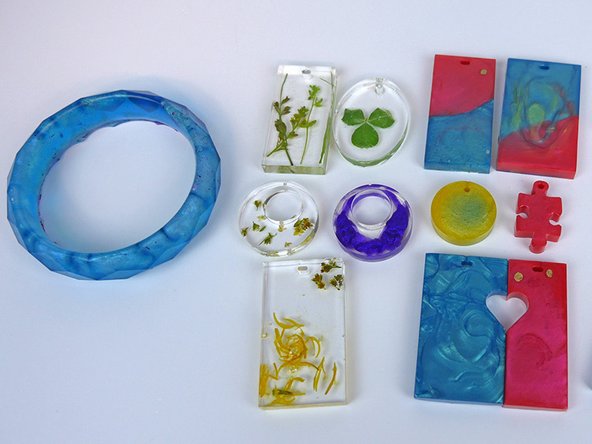
Ever thought you could create jewelry more stylish and beautiful than the store-bought stuff? With our project-ready TotalBoat Epoxy Jewelry Kit, you can! This convenient kit comes complete with everything you need, including our TotalBoat MakerPoxy by Jess Crow, coloring agents, mixing tools, and a variety of flexible silicone jewelry molds. It’s easy and fun to let your imagination run wild with color and shape to make eye-catching pendants, bracelets, rings, and other pretty things!
Video Overview
-
-
Make sure your work surface is level. Adjust, if needed.
-
IMPORTANT: Cover your work surface with plastic sheeting to protect from drips and spills.
-
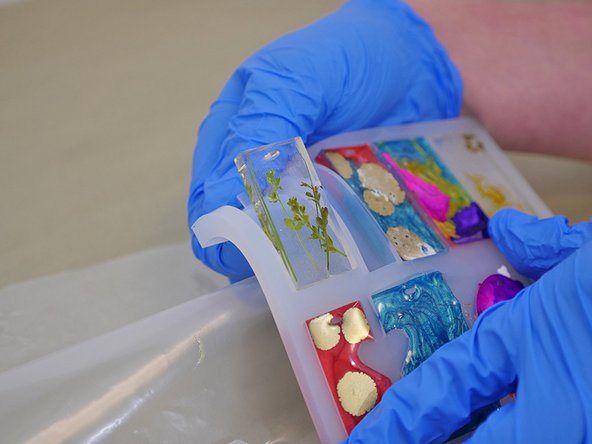
Gather the epoxy, hardener, mixing cups, stir sticks, jewelry molds, pigments, heat gun, gloves, and other materials you need to make your jewelry pieces.
-
-
-
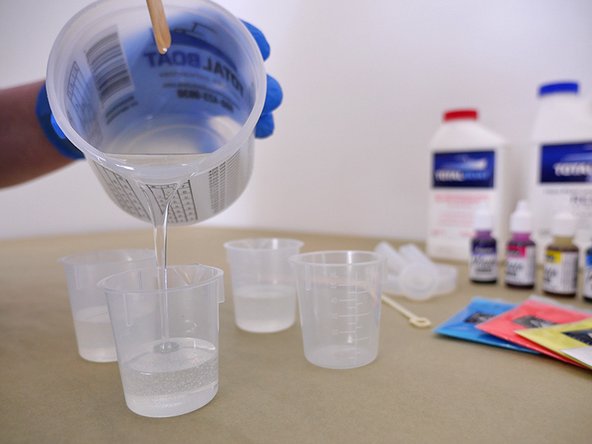
Dispense 1 part TotalBoat MakerPoxy Epoxy Resin to 1 part TotalBoat MakerPoxy Epoxy Hardener (by volume) into a clean mixing cup.
-
-
-
The 2-cup mixing method ensures both components are mixed thoroughly, for best results:
-
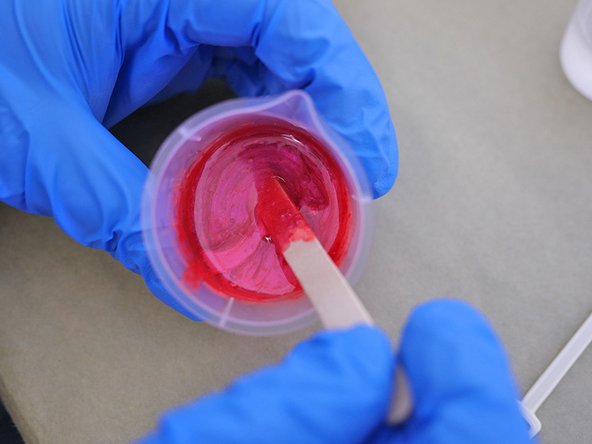
Mix both components thoroughly for 1-3 minutes. While stirring, be sure to scrape the bottom and sides of the cup.
-
Pour the mixture into a second clean mixing cup and stir again for 1-3 minutes.
-
Mixing Tips:
-
Minimize air bubbles: When mixing the components, stir slowly. Aggressive stirring creates a lot of air bubbles, which can remain suspended in the epoxy.
-
What to do if you get a lot of air bubbles while mixing: With the epoxy still in the mixing cup, use the heat gun (low heat setting) to pop air bubbles. Wave the heat gun back and forth quickly above the surface to make the bubbles rise to the top and pop.
-
Do not leave the heat gun in one place for too long trying to pop every bubble because you can singe the surface.
-
-
-
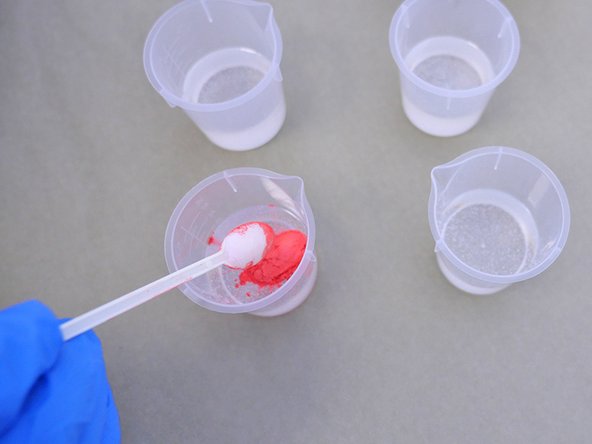
You'll probably want to experiment with using some of the different types of pigments to achieve a variety of effects.
-
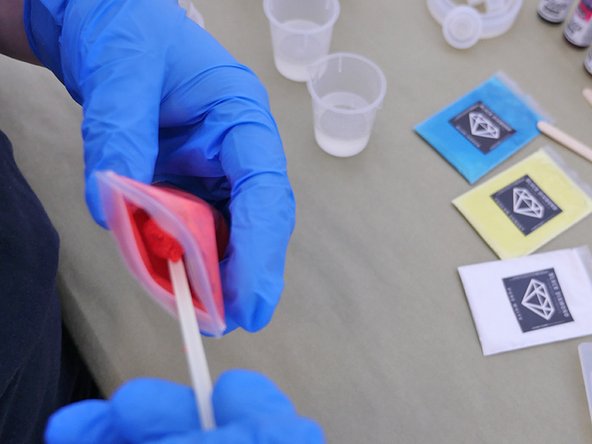
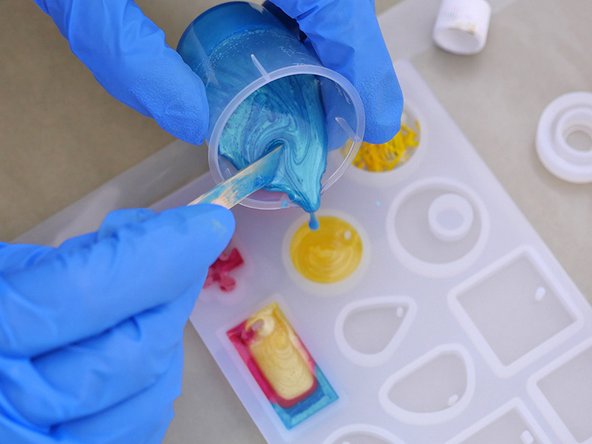
Pour the mixed epoxy into separate smaller mixing cups before tinting.
-
-
-
Be sure the resin and hardener are mixed thoroughly before adding tints.
-
Whether you're using mica powder pigments, alcohol inks, dispersion pigments, or universal tints, a little bit goes a long way, so add it slowly, and mix thoroughly.
-
Tinting Tips:
-
If using alcohol inks, shake well before use. The alcohol ink colors flow and blend easily, so use them carefully.
-
To prevent colors from blending together, first pour clear mixed epoxy into the mold.
-
To get a translucent color with the coloring agents included in the TotalBoat Epoxy Jewelry Kit, mix alcohol ink only (no powder pigments) into the mixed epoxy.
-
Another epoxy-safe option for tinting is to use the concentrated liquid tints in the TotalBoat Mixol Universal Pigments Kit. These tints are great for other projects, too, such as epoxy river tables, epoxy ocean wave effects, epoxy resin art, dirty pours, marbling effects, faux finishing projects, color correcting paints, and more.
-
-
-
Pour your mixed epoxy into the molds, as desired.
-
There are small syringes included in the TotalBoat Epoxy Jewelry Kit. Fill them with tinted mixed epoxy and use them to help control the color placement by injecting a little color just where you want it.
-
-
-
Right after pouring mixed epoxy into the molds, you can embellish your jewelry by adding additional color, adding drops of alcohol ink pigments, or embedding small items in the wet epoxy, such as gold leaf flakes, charms, glitter, small crystals, tiny buttons or shells, dried flowers, etc.
-
Embellishing Tip: Once the mixed epoxy is in the mold, try experimenting with the alcohol inks to achieve different effects.
-
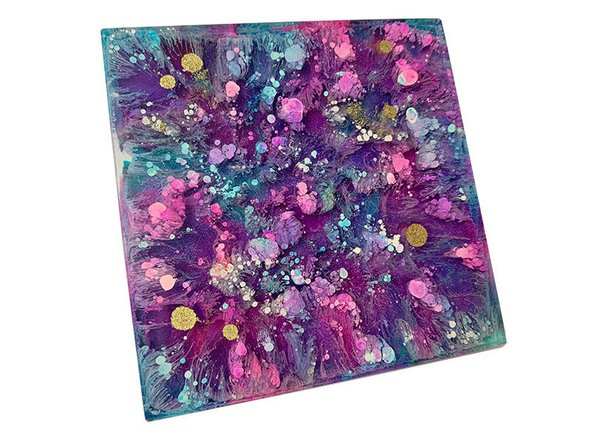
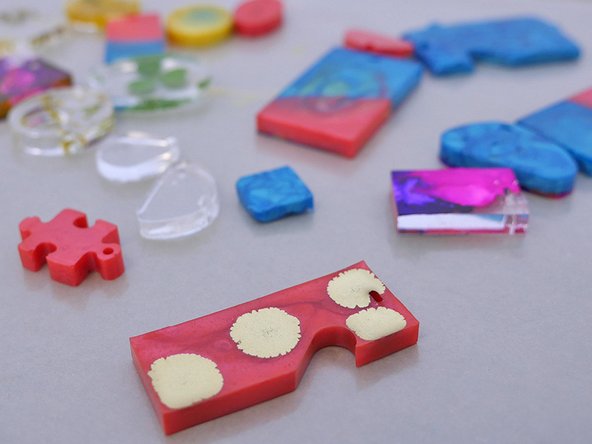
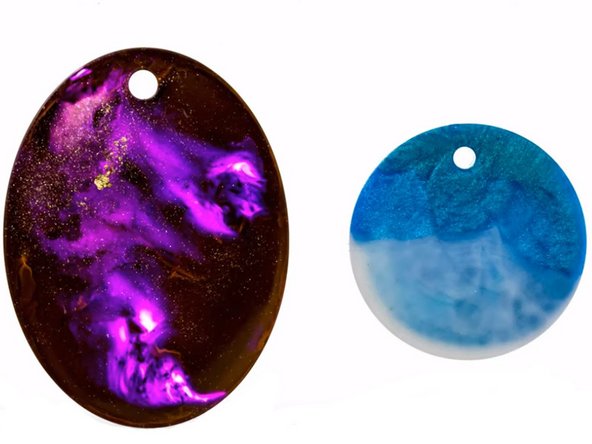
Example: Create an interesting droplet effect by adding small drops of colored alcohol ink pigments, then add droplets of the white alcohol ink on top. The white ink is heavier and will weigh down and sink the colored pigment drops. When you remove your piece from the mold, you'll see small, colorful, floating droplets (as in the third image).
-
-
-
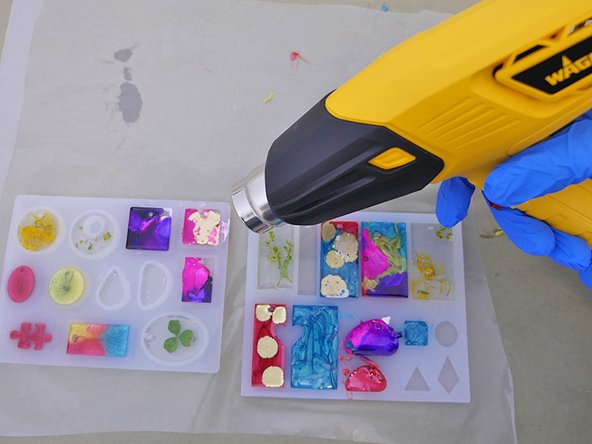
To pop any small air bubbles, wave the heat gun (on low setting) quickly, back and forth above the surface, and keep it moving. This only takes a couple of seconds.
-
-
-
IMPORTANT: Wait about 24 hours for the epoxy to cure completely.
-
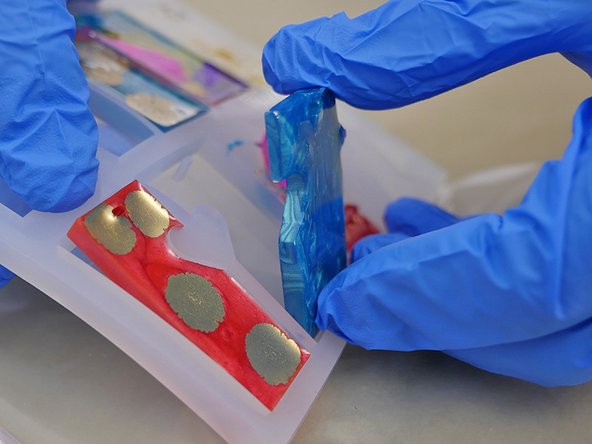
To remove the jewelry pieces from the mold, press firmly against the back side of the mold. The silicone molds provided in the TotalBoat Epoxy Jewelry Kit will create a glossy finish.
-
-
-
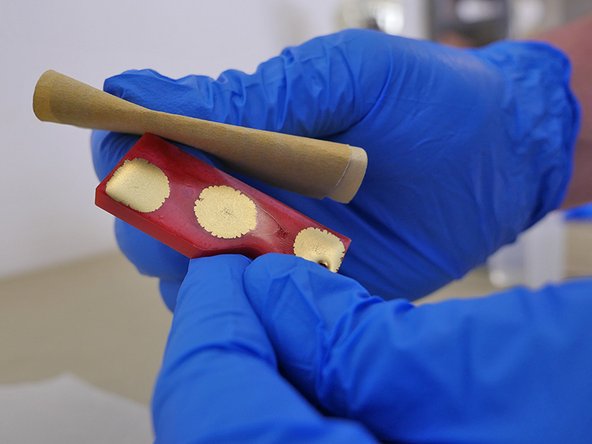
If you have a couple of edges that need to be a little smoother, sand lightly with 320-grit sandpaper. Be sure to wear a dust mask or N95 respirator when sanding cured epoxy.
-
-
-
Once you've made a few pieces, you'll want to keep making more because the process is easy and the results are beautiful.
-
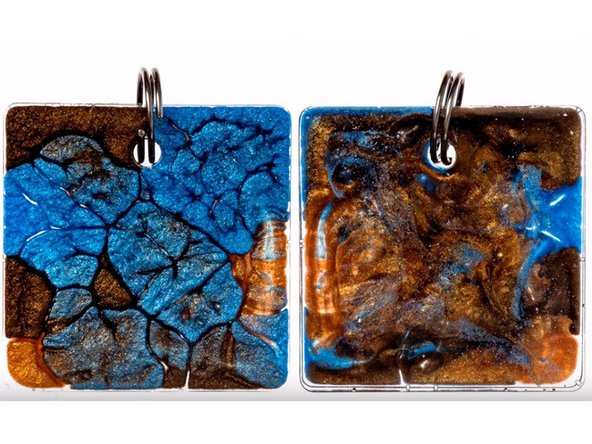
The jewelry in the second and third images was created by TotalBoat Ambassador Dwain Coufal, of Casual Collisions. For more inspiration check out his complete video series on Youtube titled Fun With Epoxy Jewelry.
-
-
-
What is epoxy sensitization? Ever hear of someone getting a skin rash after using epoxy? A rash is one form of sensitization — it's the process where your body gets more and more sensitive to epoxy products. Rashes are a common sign, but eyes, nose, throat, & lungs can also be affected. Everyone reacts differently, so proper PPE is critical.
-
Before you start making epoxy jewelry, we recommend the following:
-
Take a look at the SDS (safety data sheets) for each product, paying special attention to the safety information in Section 8: Exposure Controls/Personal Protection.
-
Gather the proper PPE (personal protective equipment) recommended by the manufacturers, such as suitable gloves, and proper protection for skin, lungs, eyes, and clothing.
-
Make sure your work area is well ventilated.
-